Installation of WHMCS ResellerWorld VPS module
Please note that this guide is only applicable to those who have successfully enrolled as resellers. If you’re interested in becoming a reseller please contact our sales team.
You have the ability to provision hostworld services from your own WHMCS installation. This means that you don’t need to navigate to our portal to order new services, or renew them.
As this approach involves your own WHMCS installation, this means that your own customer journey is much smoother, requiring less manual intervention to oversee transactional activities. This leaves you with more time to do more important things like building your business!
This guide will talk you through the steps to install our module within your own WHMCS installation.
- Login to our control panel at https://portal.hostworld.uk and navigate to Services -> Reseller Area
- In the Settings tab scroll down to the “Integrations” section and click the download icon. Remember the name of the Integration. Save this locally.
- We recommend you take a full backup of your files and WHMCS database now, just in case anything goes wrong.
Extract and upload the integration module into your main WHMCS directory.Once you have uploaded and extracted the integration module, you should find a new folder with this module in the following directory:
/modules/servers/*name of Integration*
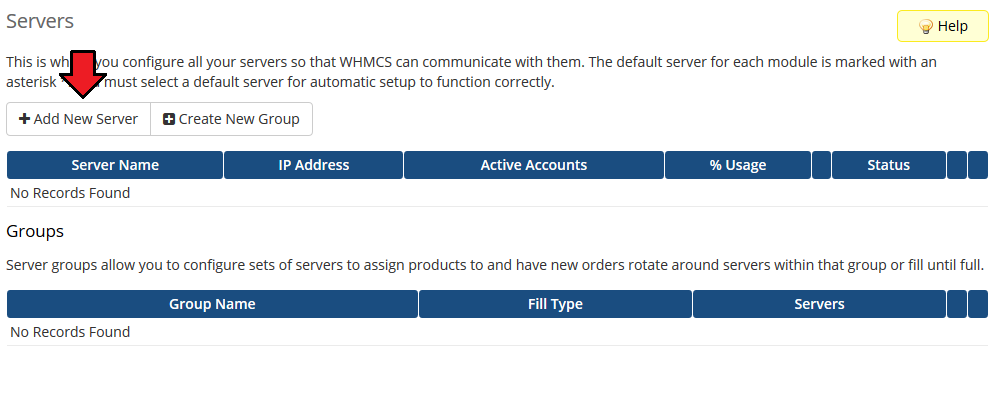
- Now, you will have to configure a new server. To do so, move to ‘System Settings’ → ‘Servers’. Once you are there, press ‘Add New Server’.
- Next, click “Go to advanced mode” and fill in the fields according to the below described pattern. You can get #4, #5 and #from here.
- Name: Anything you want
- Hostname: Anything you want
- Module: select from the dropdown menu the Integration name
- Username: your hostworld reseller account email address
- Password: this is NOT your hostworld password. Enter your hostworld reseller account API key
- Access Hash – API URL
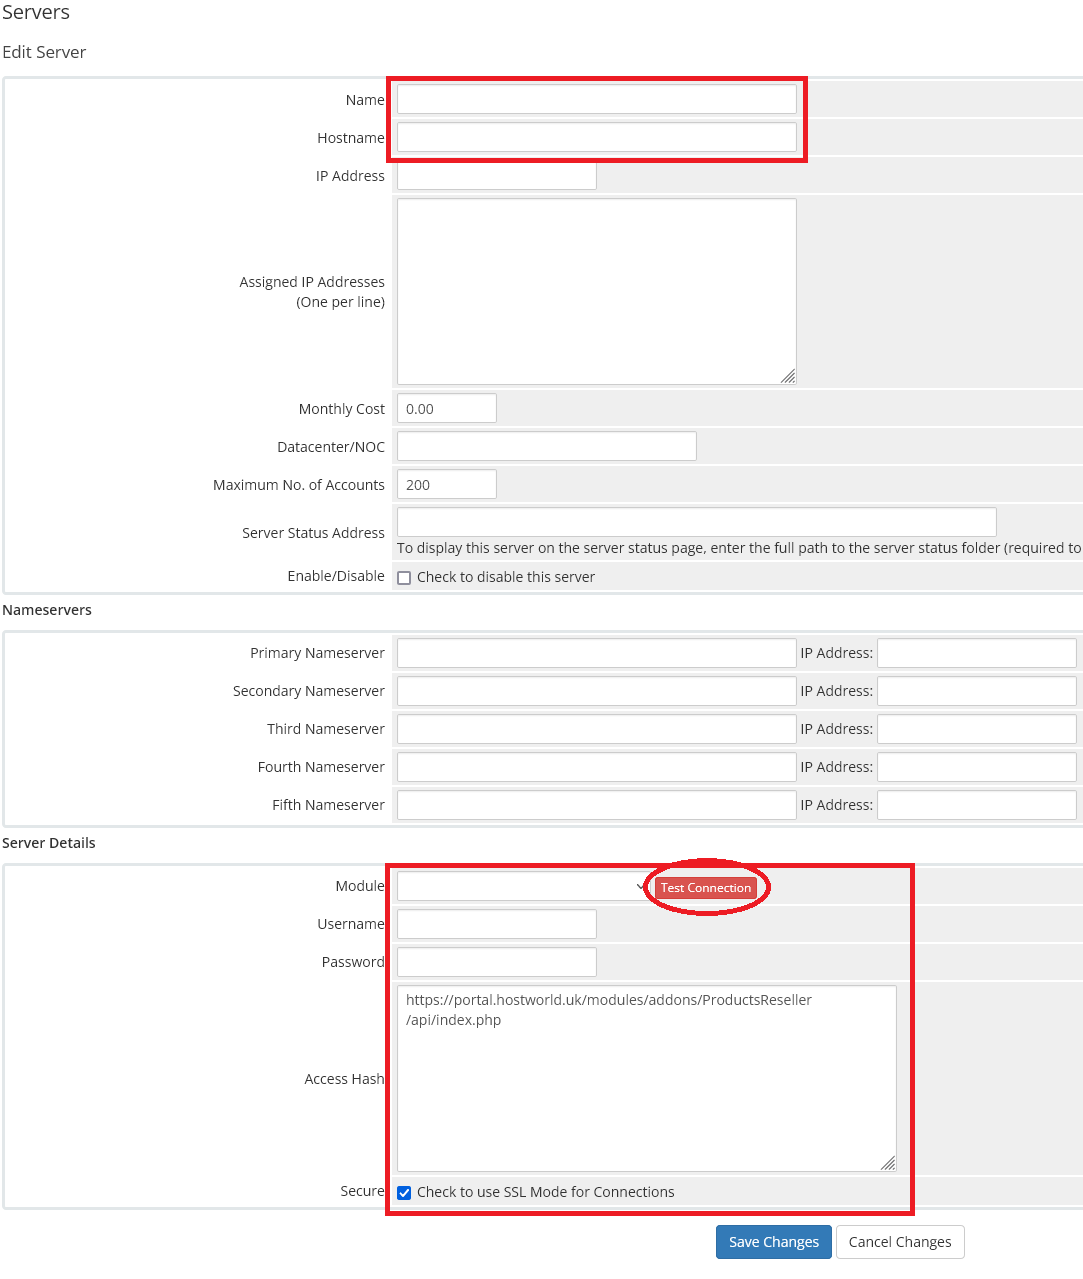
- After you configure your server correctly, you will see the following screen.
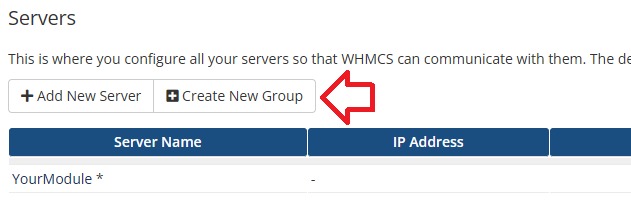
At this point, you need to create a new group for your server. For that purpose, press ‘Create New Group’.
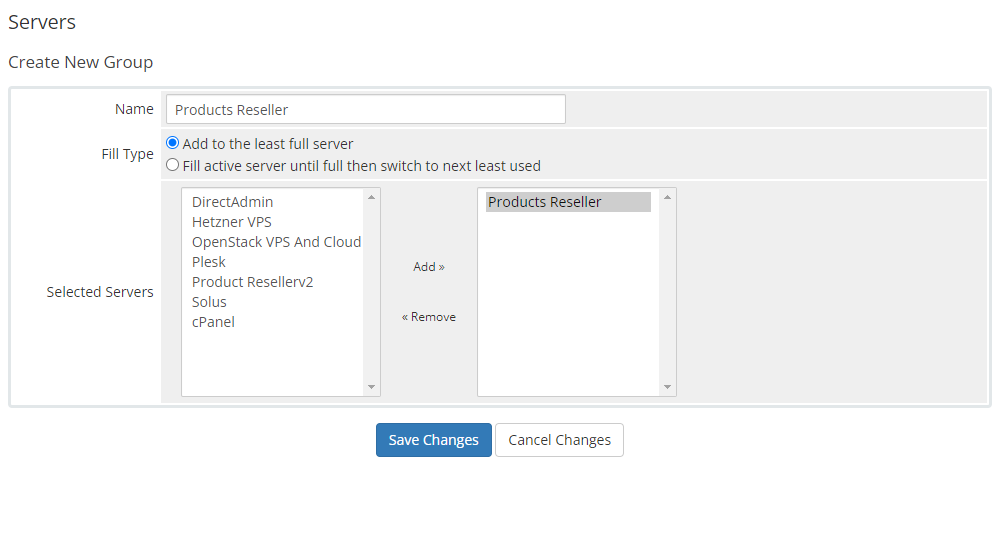
- Enter the name, click on your previously created server, press ‘Add’ and then ‘Save Changes’.
- The next step to follow is creating a product and its group. Go to ‘System settings’ → ‘Products/Services’ → ‘Products/Services’ and create a new group.

- Enter a product group name and press ‘Save Changes’.
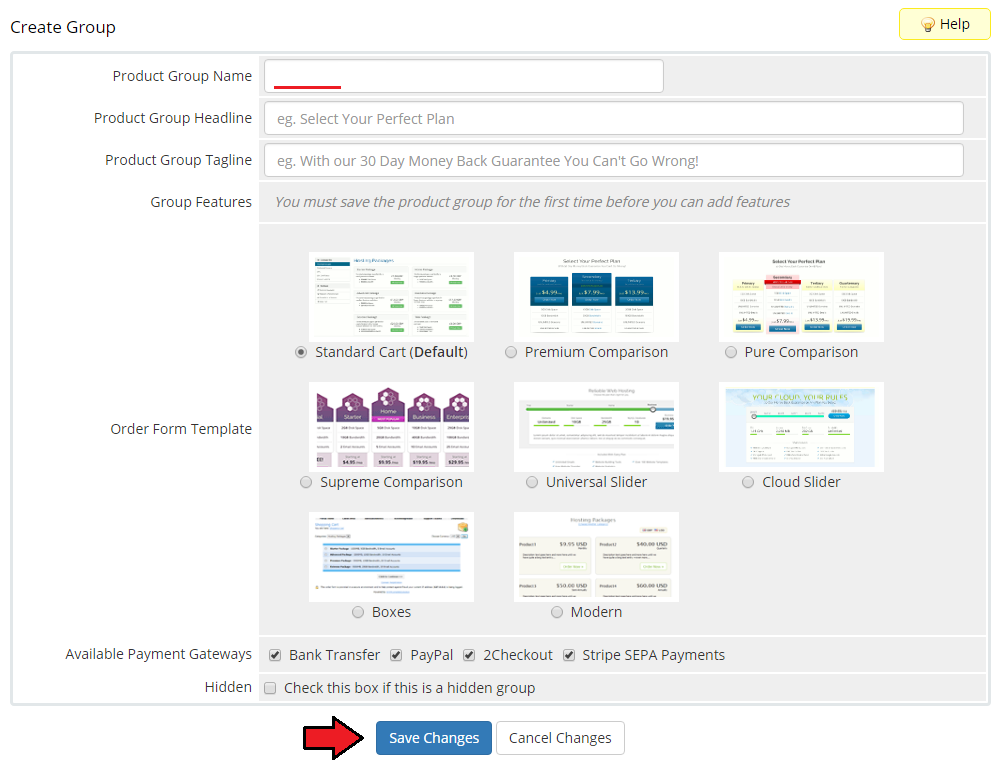
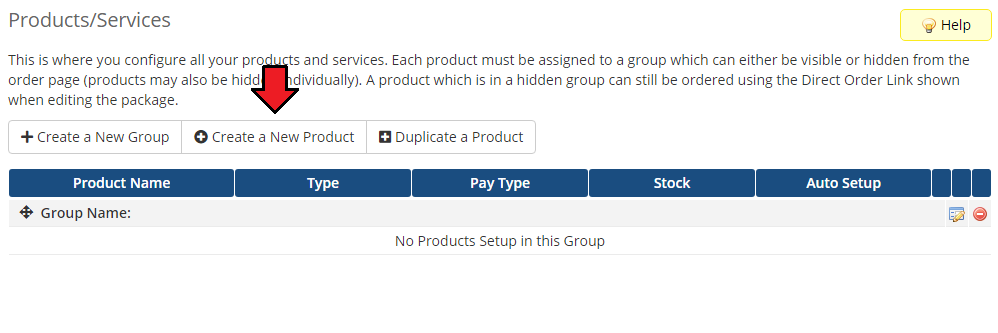
- When you have a product group, you can assign your product to it.
To create a product, click on ‘Create a New Product’.
- Afterwards, choose a product type, then select the previously created product group from the dropdown menu and provide a product name.
Finally, find the uploaded integration module in the dropdown menu. Do not forget to save changes.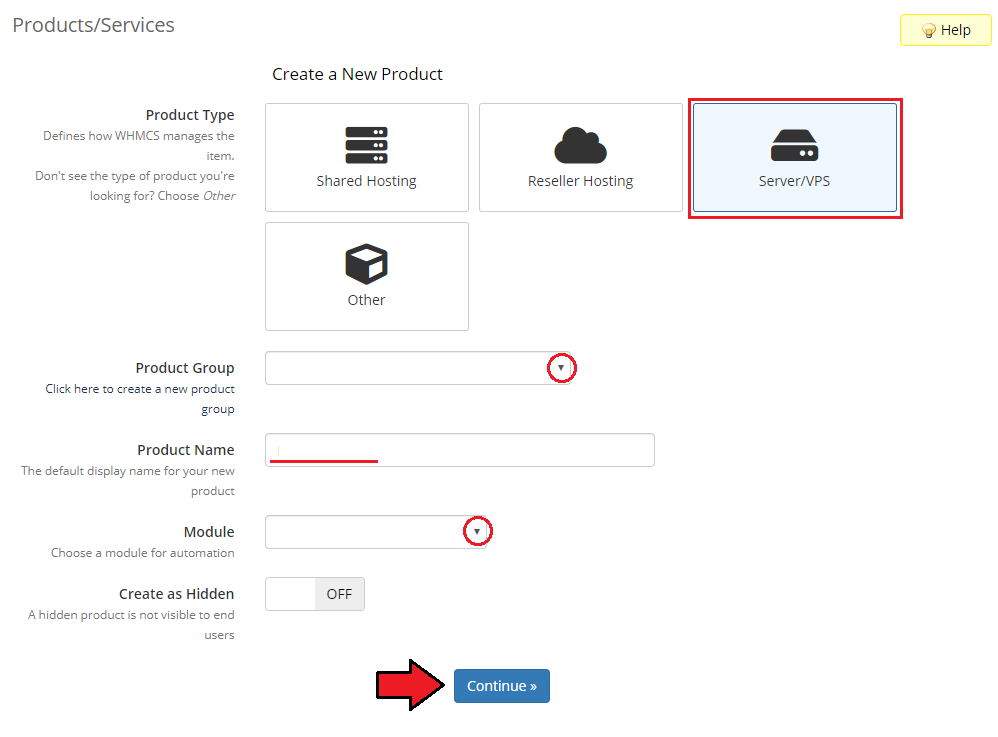
- In the ‘Details’ tab of the product configuration, we highly recommend setting up your ‘Welcome Email’ template first.
Welcome emails are sent to the end-client once the product creation is completed and contain important details such as account/service credentials, server information, assigned IP addresses etc.
Before you choose or create your own product’s ‘Welcome Email’ , please make sure which of the merge fields variables in the email template are currently supported by the product. We also recommend unchecking “Require Domain”.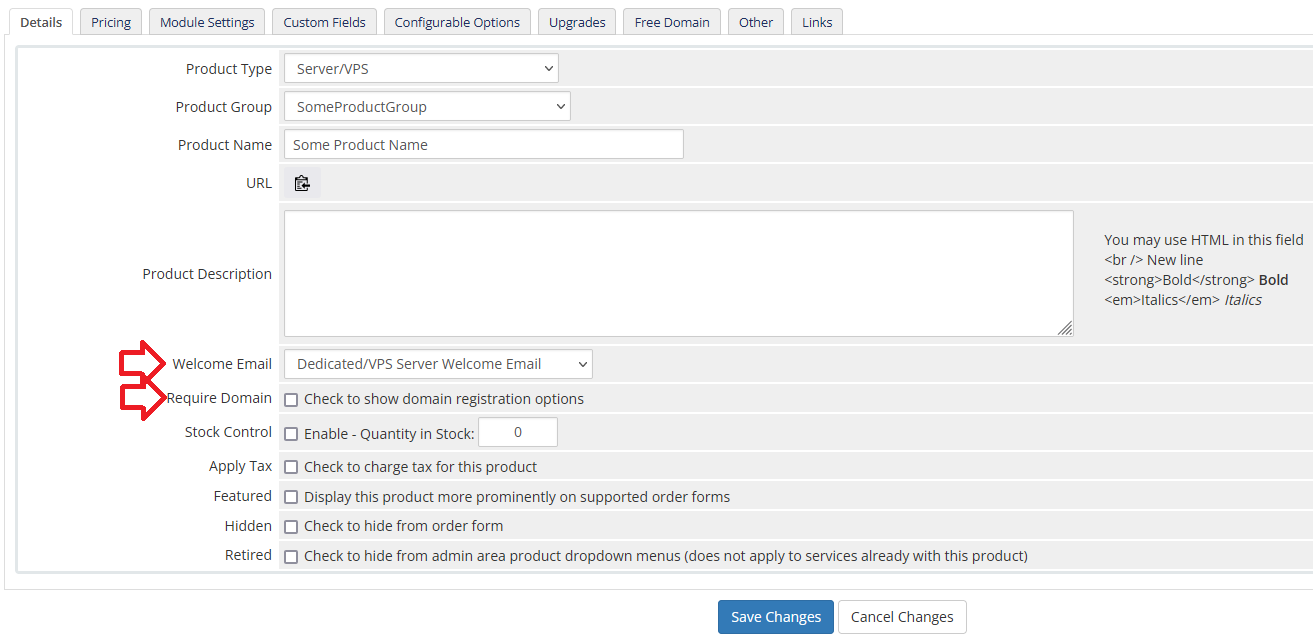
- Set up the pricing for your product that you will charge your own customers and click “Save Changes”.
- Finally, after saving previous changes, go to the ‘Module Settings’ and select the integration module server that you created in the below steps.
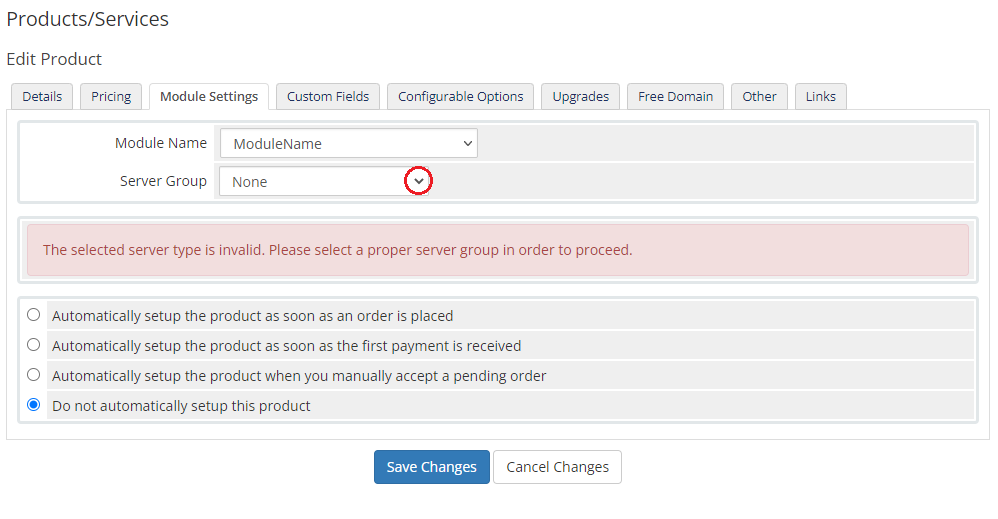
- Now, in the ‘Main Configuration’ you may select the ‘ Reseller Product’ and a ‘Billing Cycle’ for that product from available (if you have created some in the previous steps).
Note that if you select Auto, original billing cycle from your WHMCS will be assigned to this product. Scroll to the bottom and then click “Save Changes”.
DO NOT click “Create Configurable Options” at this stage.
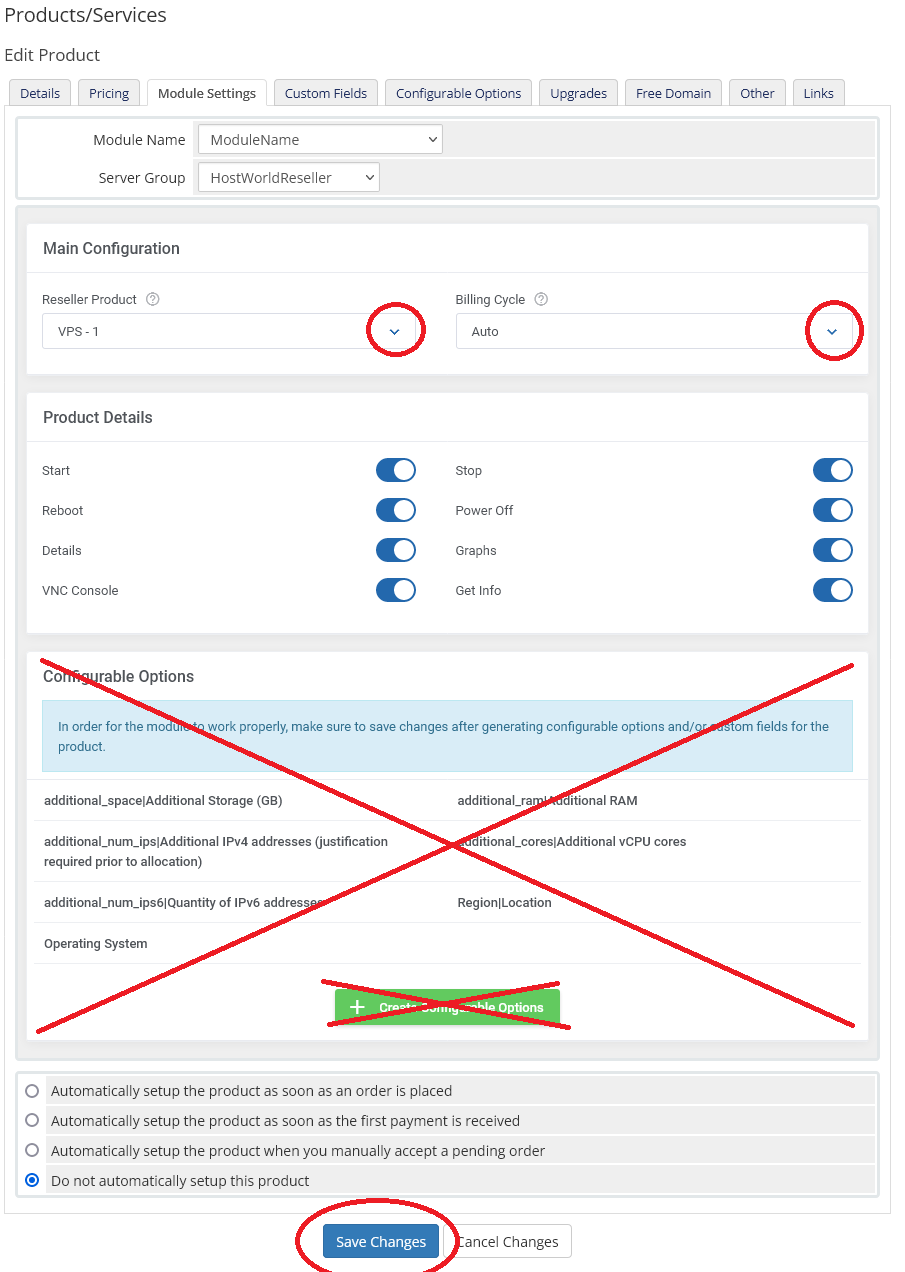
- Now, if there are any configurable options or custom fields available you should click “Create Configurable Options” and then create them all. All of them will be required for you to properly provision your VPS orders. Once generated, the configurable options group will automatically be assigned to product. Please also note that you need to generate separate sets of configurable options for each product.
Remember to save the changes in the end. - You may make other adjustments within the Product setup page as you normally would. You may also wish to set pricing for your configurable options at this stage too.
- The setup process is now complete. We recommend you test comprehensively before provisioning orders for real customers

